


I have a 1 car attached garage (about 25×12) that I’ve been using for various projects.
I’ve been wanting to upgrade the electrical since I moved in about 7 months ago, and I figured I’d do it in EMT. It’s rather stupid because the wall I’m installing most of the conduit on is adjacent to the house — however it’s framed separately, and there is a ~2″ gap between the back of the framing and the side of the house. It would make a perfect wiring chase for NM-B, making the job a hell of a lot cheaper and easier. But I wanted EMT because, well, for fun. It looks cool too. This is the first project I’ve ever piped and I made a few mistakes (like not putting offsets at the boxes), but I learned a lot.
This is by far not my first electrical project, and it’s probably not for the faint of heart.
Background
The garage had 2 20A circuits running to it, one for lighting and 1 recept. group, and the other for just receptacles. Lighting consisted of a single 100W bare bulb in the garage, and another in the garage attic. The receptacles are all about 12-18″ off the floor, and were always getting blocked by crap I’d store against the walls. A couple are damaged; probably the previous h/o had been doing a project of his own and knocked into them.
The circuits were basically fine for me for the time being — my highest draw tools are a 15A contractor table saw and a 12A shop vac. So long as I ran their cords to opposite sides of the garage, I’d be fine. (Of course, I couldn’t run my compressor at the same time).
The lighting was my main problem. I’d get plenty of natural light during the day, but at night I’d need to set up portable lights, which is inconvenient at best and they’re never in the right place at the right time.
I happened to rip a 4-bulb T8 fluorescent fixture out of my kitchen recently (I installed recessed cans in its place), which is plenty bright. So my plan was to put that in the garage, plus a couple of other light fixtures, and also add some more receptacles.
Pics follow. If anyone has suggestions, comments, criticisms, etc., please let me know!
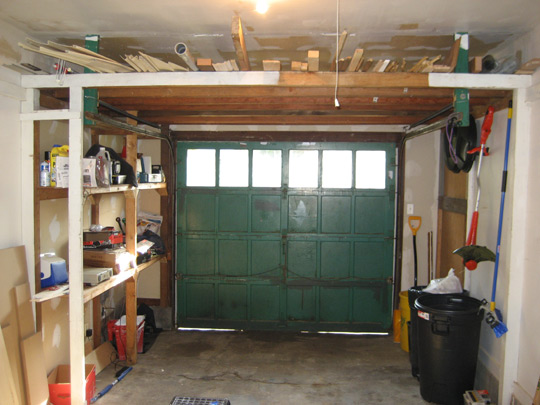
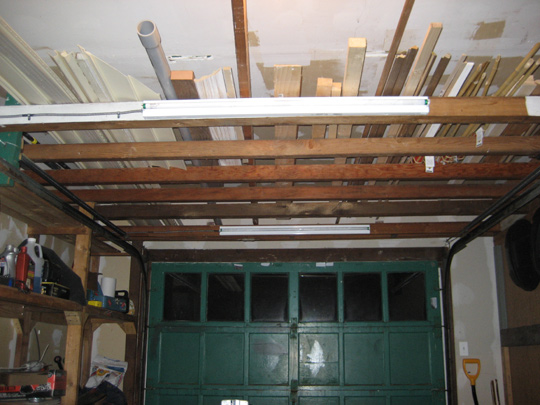
Front of the garage. Good lumber storage above, but it makes lighting difficult.

Back of the garage. Good natural lighting and ventilation. I have a couple of window fans I use for cooling and venting out paint fumes.
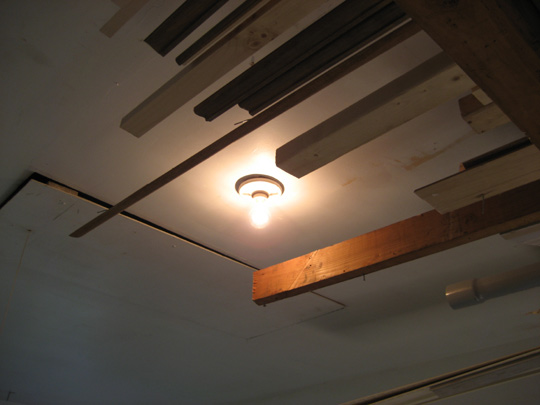
My fantastic task lighting. Ceiling is 10ft. high.
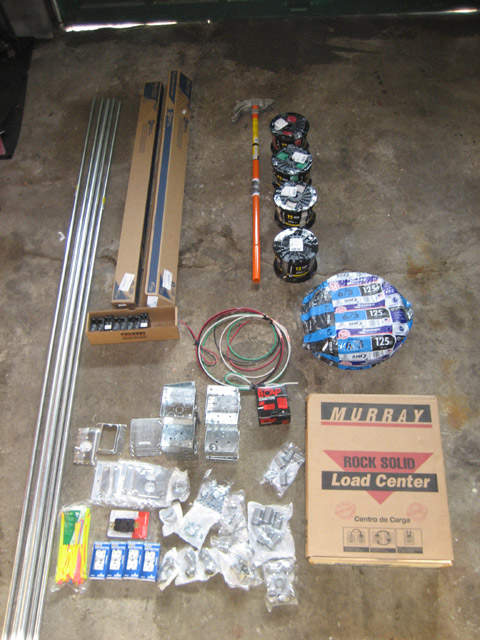
First Home Depot run. Didn’t forget much. Figured I’d post this in case anyone wanted to know what brands I’m using.
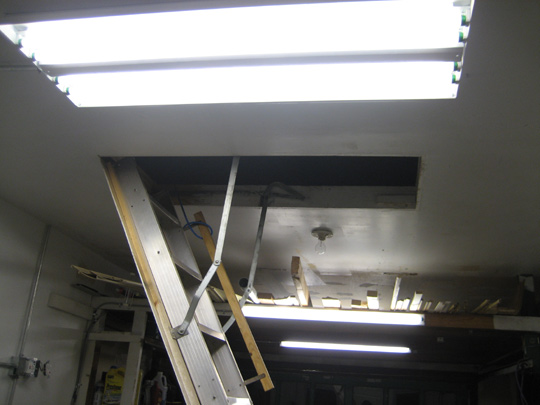
New main light fixture. Sorry for the weird angle, but it’s the only way I could get the full conduit run in there.
Lights in the front. I realized far too late that the one in the background gets hit by the door, so now I can’t get it open. I’ll have to move it back to the next 2×4. Fortunately I did those lights with MC and not EMT, so it should be an easy move.

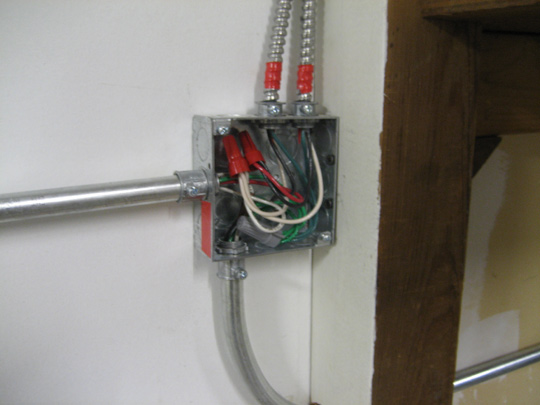
The jbox just after the panel on the bottom will have a dedicated MWBC split onto 2 receptacles on the same yoke. Next jbox just has wiring connections, no devices. You can see some AC coming out of it; they feed 2 new single-bulb fluorescent fixtures. The EMT coming out the bottom of that box goes to a receptacle unit with a dedicated circuit, to be used for chargers, a radio, and other things.
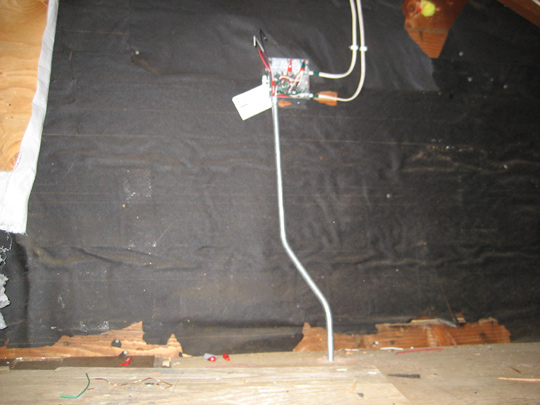
The conduit that goes up into the ceiling in the previous pic comes out here, in the garage attic. It looks a bit weird, but the offset goes back towards the wall (~3″) and also to the left. It is plumb where it heads up towards the jbox, even though it looks angled in this pic. The NM-B coming out of the jbox goes to 2 luminaires on the front of the garage — they are controlled by the timer in the next pic. Some NM-B that currently runs to a switch next to the door in the back of the garage will enter this jbox from the left.
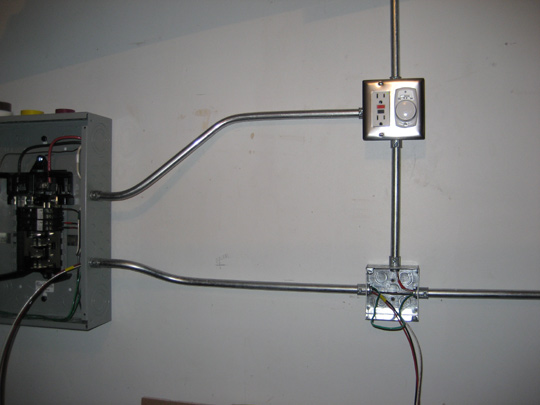
Timer for the outdoor lights. The GFCI supplies the timer/lights — personal preference, but I like my outdoor lighting on GFI. I had to put offsets in the EMT coming from the panel because the knockouts close to the wall are all blocked by the neut. buss bar!
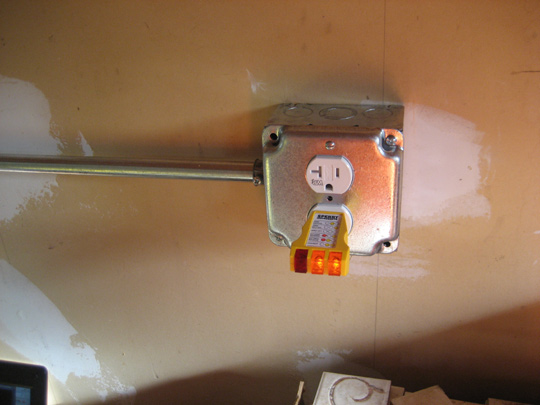
Receptacles closest to the front of the garage — at the end of the conduit run that goes off the right of the panel. I needed to get some usable power coming off the new panel so I can have lights when I disconnect and re-wire the existing circuits.

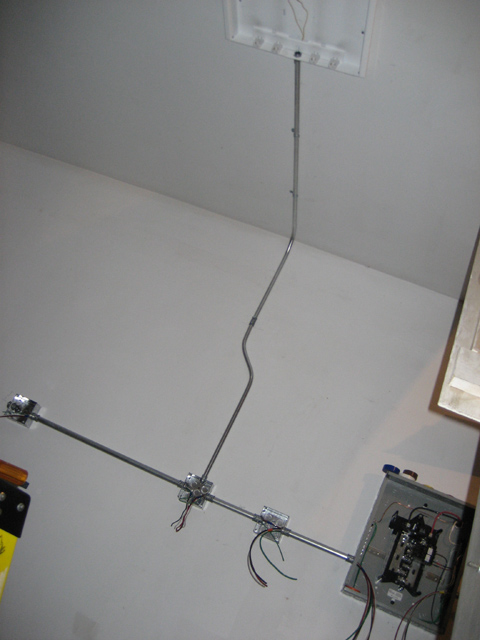
Close-up of the panel. Not much done yet — the circuit hooked up is the one from the above pic.
Details
50A breaker at the main panel (in the basement, about 6 feet below and 6 feet to the left of the sub).
6/3 feeder. (Yes, I bought 125 ft. of 6/3. I just could not bring myself to spend $2.36/ft. when I could get 125 ft. for $136). I figure I’ll use it eventually, or at least sell it.
100A disconnect at the sub.
Why only 50A, and not 100A+? Simply because I don’t need more than 50A. And if I ever do, I can pull a new line from the main panel to the garage. It’s a very easy pull. The only reason I’m doing a sub is b/c I don’t have space in the main panel for all those breakers. (And yes, I like LOTS of circuits).
I’ll connect the existing receptacles near the floor to the sub today or tomorrow.
All wiring in conduit is 12 AWG THHN/THWN. The NM-B in the attic is 14/2 and will be on a 15A breaker. Existing receptacles were wired with 12-2 NM-B. I tagged the wiring for each circuit with its own color of electrical tape. Wiring is tagged in every box, even if it doesn’t terminate in that box.
EGC is #12, except where it hits a future 240V/30A receptacle; there it’s #10 from the panel. I didn’t want to use the EMT to bond everything together. I don’t have a good reason for that…
UPDATE 2009-06-10
I didn’t do anything last night, but did some new work on Monday. I also did three stupid things:
1) I mounted a light switch upside down.
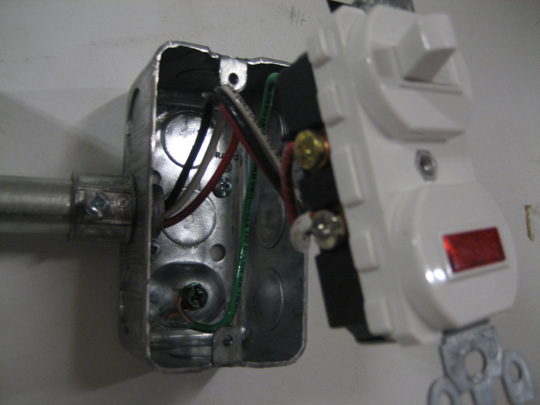
2) I shorted the neut. to ground in a box and almost didn’t notice.. You’ll see — it’s not quite as stupid as it sounds (well, maybe it is).
3) I bought the wrong switch. Or they mfr. them in an illogical fashion.
The good news is I moved the light that was blocking the garage door. They all work, and it’s a heck of a lot brighter in there!
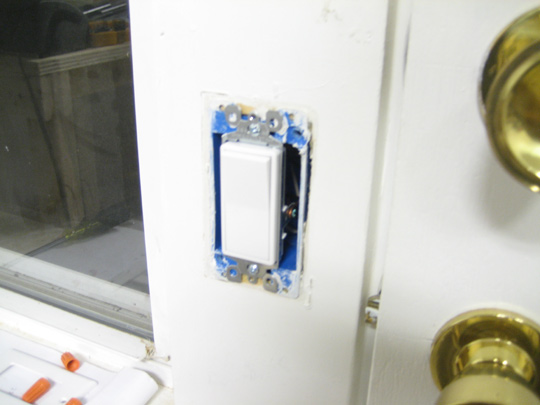
Upside-down switch. I was in a hurry to get the new lights on. This switch was existing and has 14/3 NM-B to the box from the attic. Luckily the 14/3 in the attic was just sorta strung on a nail with tons of slack. I was able to easily get it to the new metal box in the attic, and I properly secured the cable to the rafters.
I installed this switch just to the right of the box w/the GFI recep. and the timer. It’s to control the attic lights, and is slaved off of the main light switch.
This switch has a pilot light. When I saw the switch I thought “the light must go on and off with the switch”. Not so! It just stays on constantly.
You can see where the insulation is chafed on the white wire, and a little bit on the red wire, too. When I put the switch in the wire rubbed against the EMT coupling, hard. I didn’t notice, but the neut. screw was also touching the coupling when the unit was fully seated, and the hot screw was maybe a millimeter from shorting. I’ll be replacing it with a plain single pole switch, which is much thinner in the back.
Oh, one more thing: All the other boxes are bonded to each other with wire. This box is only bonded by the EMT. It’s a switch, so I’m not terribly concerned; I’ll probably leave it that way.

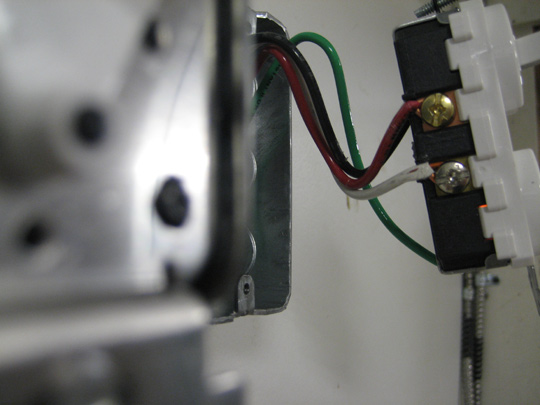
Close-up of 2 boxes, for no reason.
Lighting connections, ready for a box cover. (You can kinda see the tail of one of them, but there are anti-short bushings in the ends of the MC. The box is bonded to that green pigtail, too).
That’s it for now. More to come later..