


Background
I’ve only recently begun doing my own maintainance and repairs on my Jeep XJ 2000. I’ve hit a few snags and problems along the way, and this page details a solution for the most frustrating I’ve encountered so far. I went to replace both my front rotors, and they were both well beyond stuck to the hub.
I’d been hammering, pushing, pulling, and spraying the old rotors on one fine Saturday for over 3 hours (4 hours if you count the time I took to go to the auto parts store and stop for a beer). Finally it was close to getting dark when one of my neighbors came along and advised that I should rent a rotor puller from a rental place nearby. The place was closed by then, so I told him I’d just kludge something up from what I’d had on hand. He laughed at me and went away.
Below is what I came up with, and it worked like a charm. I’m sure I’m not the first one to do this, but I was pretty pleased with the results, and so I share it with you.
Safety
Needless to say, I claim no responsibility for what happens if you attempt to use the information on this page. This could be dangerous, it could break your tools and/or your car, so emulate it at your own risk.
That having been said, I did this exact procedure for both my front rotors, and absolutely nothing went wrong. It worked great both times, and except for a couple of bent screws on my C-clamps, nothing was damaged. (They were cheap clamps anyway).
This will quite probably damage your rotor. I was completely replacing mine, so I didn’t care. If you are going to have the rotor turned, you might not want to do this, or at least put padding on the clamping surfaces and in front of the hub where the rotor will land when it pops off.
Also, many thanks to all the helpful people on jeepforum.com. I’ve hardly looked at my Haynes manual since I found that site.
What You Need
- 4 C-Clamps
- 1 Bottle jack (came stock w/my Jeep)
- 10 Ft (appx.) strong rope
- 1 Stuck rotor
A hammer and some Liquid Wrench type thing will probably help as well.
The Steps
 Step 1 – Spray some penetrating lube/rust remover so it soaks in between the rotor and hub and let it sit for a while. |
 Step 2 – Attach the first two c-clamps to the area where there is no backer plate (where the caliper sits). Make sure they are gripping the rotor ONLY. |
 Step 3 – Attach the second two c-clamps such that each one is directly opposite one of the ones you’ve just put on. C-clamps should be spaced as evenly as possible, and tightened well. You may have to jam the second two clamps between the backer plate and the rotor. I didn’t have much trouble at this step, and the backer plate wasn’t damaged by bending it out of the way. |
 Step 4 – Zip tie the bottle jack to the top two clamps such that the head of the jack rests on the hub. |
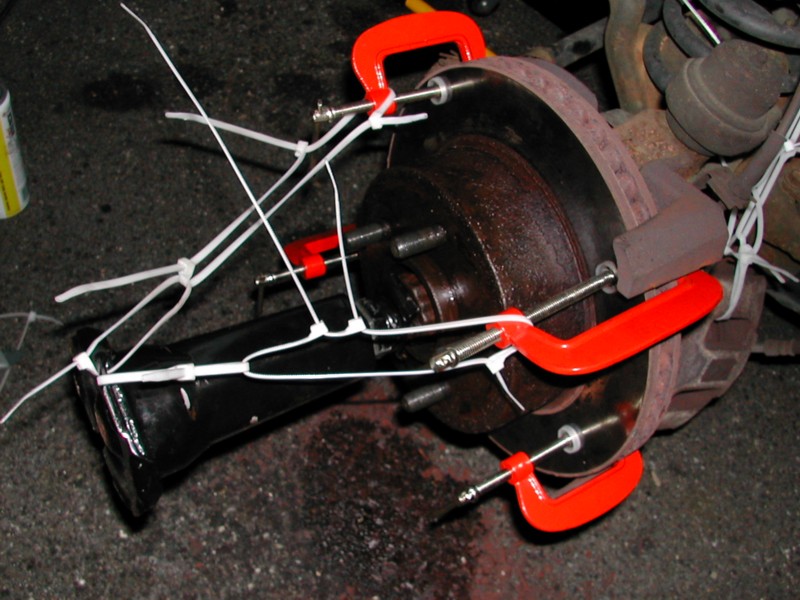 Step 5 – Close-up of the above. Note there’s a hole in the base of the jack that the zip ties are running thru. |
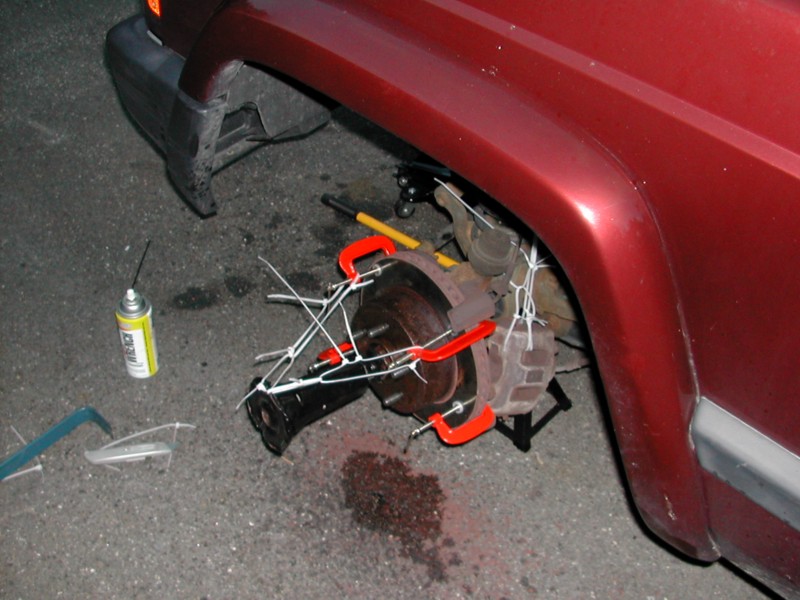
 Step 6 – Tie off the end of the rope to one clamp and run it over the base of the jack to the opposite clamp and tie off there. I did 2 turns of rope between each pair of c-clamps for added strength. Repeat for the other pair of clamps so that it looks like this. Make sure the rope is snug so that it holds the jack in place.Also, make sure the jack is as perpendicular as possible to the rotor so that it doesn’t pop off sideways! |
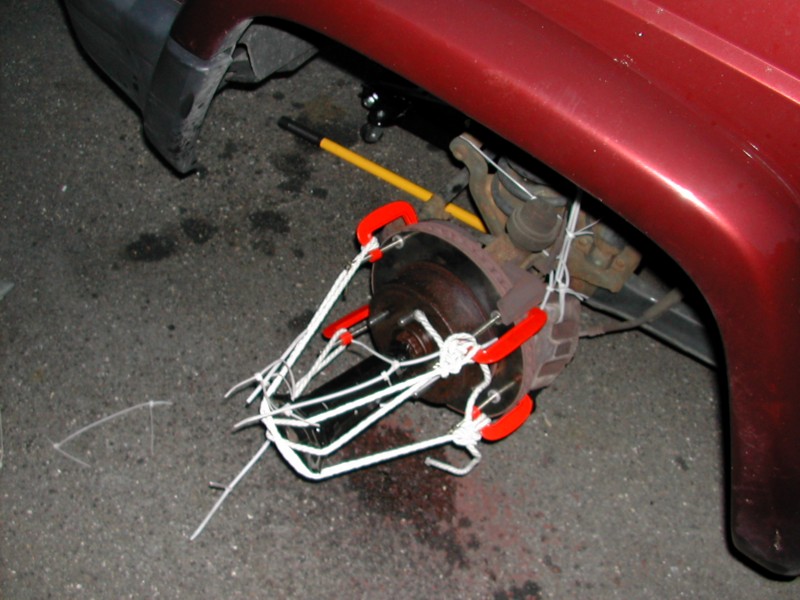 Step 7 – With the rope snug, cut the zip ties. You don’t want them snapping off under tension. If the rope isn’t snug enough to hold the jack in place, crank it out a little bit. |
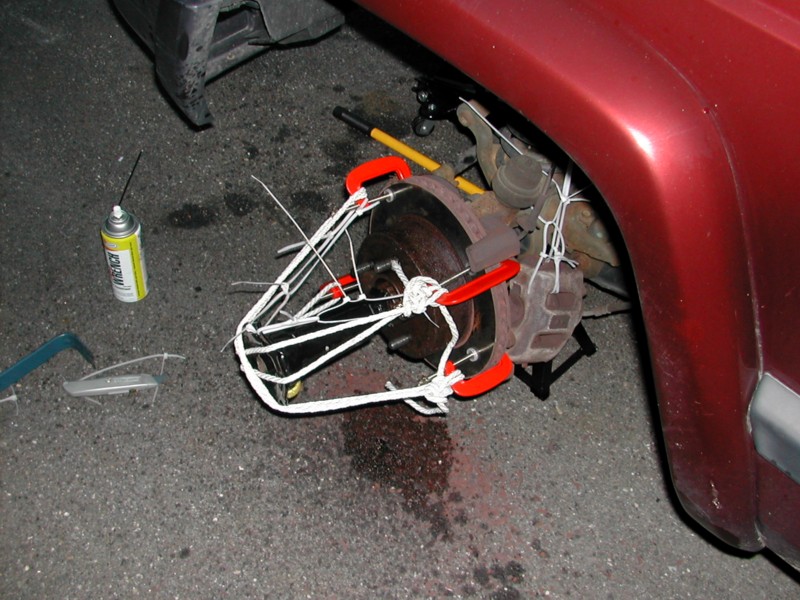
 Step 8 – Begin cranking out the jack until the ropes are very taut. Keep an eye out for rope fraying, clamp or jack slippage, or knots coming undone. Stand to the side of the jack/rotor, never stand in front of it! It can pop off with great force, and you don’t want it landing on your foot! |
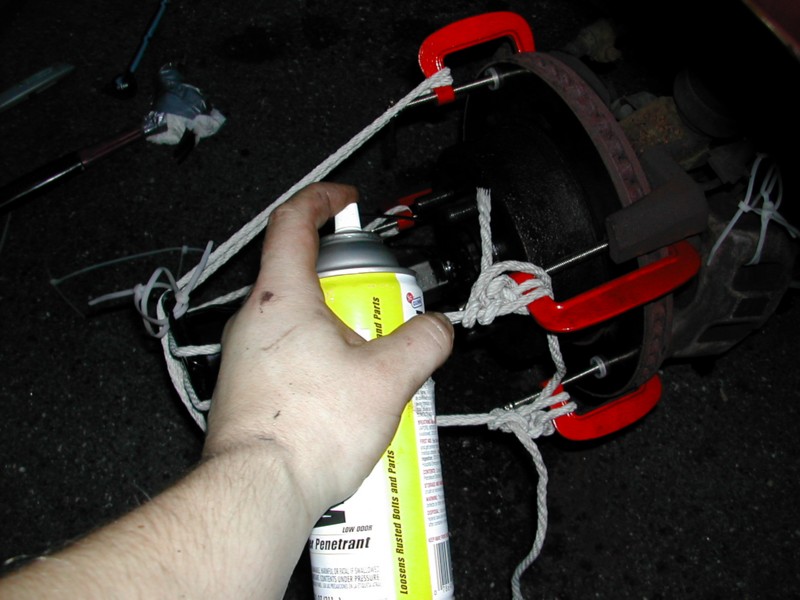 Step 9 – As you increase the tension a bit at a time, keep giving the hub/rotor shots of Liquid Wrench (or similar). Give the rotor a few taps from behind, it may pop off with ease. Don’t whack the rotor/jack/etc hard. You don’t want the jack coming loose and flying off under tension! |
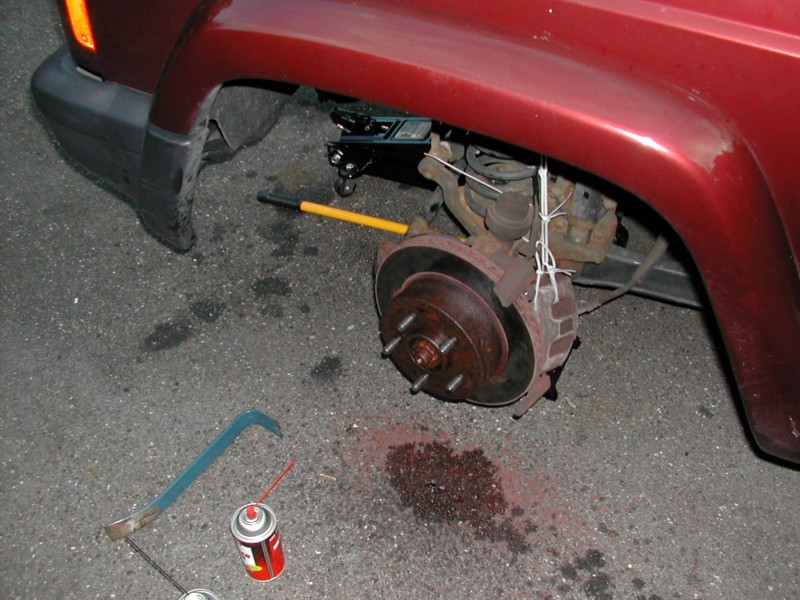
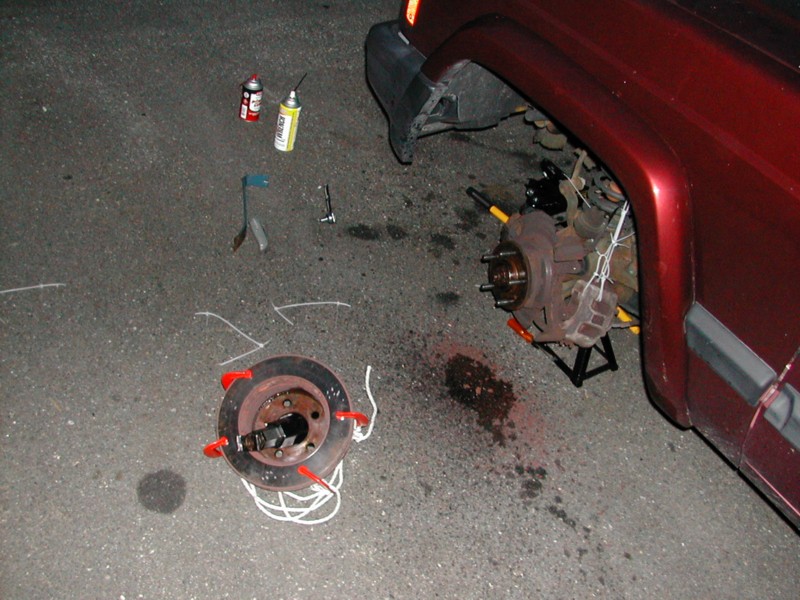 Step 10 – POP! The rotor flys off. Picture shows exactly where it landed. This one required a LOT of tension; in fact, the jack wouldn’t extend any more. |
 Step 11 – Closeup of the assembly. The jack and the clamps are undamaged. Again, this may damage your rotor severely, so either don’t do this, or put padding all around if you plan on having the rotor turned and reused. |
 Step 12 – The Result. |